How to draw a 3D Christmas tree with SOLIDWORKS Apps for Kids?
It’s the perfect time of year to teach your kid how to draw a 3D Christmas tree! Learning to draw from a young age is an excellent way to spark creativity. It’s also a fantastic activity to learn shapes, colors, and the basics of illustration and designing.
Offering a range of fascinating free applications for kids as young as four years, SOLIDWORKS Apps for Kids makes 3D drawing super fun and easy!
But let’s dig into this 3D Christmas tree video tutorial on how to design a custom festive tree in less than 3′.
Designing The Christmas Tree Using Shape It
Shape It is perhaps the perfect tool for kids to turn their ideas into reality. Using this simple tool, your kids can draw basic shapes like circles and rectangles to trickier designs like a castle! It’s a stunning app to let your little one explore shapes, designs, and sizes.
Your child can select any basic shape, such as a circle, and then start modifying or reshaping it. They can pull, push, remove, extend and reposition any shape to turn it into amazing 3D drawings!
Let’s check out the simple steps on how to make a 3d Christmas tree:
- Launch the Shapes command and click on the Cylinder option for the base of the tree.
- Then, click on the Cones option three times for the main body of the tree. It creates the basic structure of the 3D tree.
- Double-click on the upper edge of the topmost cone and pull the drag handle to modify its shape.
- To get a pointy shape for the cone, pull the drag handle up.
- Double-click on the cone’s edges to make the base of the cone larger.
- Follow the same steps for adjusting the shape of the second cone from the top.
- Make its base wider but don’t make the tip pointy, and adjust its position in moving it upwards.
- For the last cone, pull the drag handle to stretch the base to widen it.
- Keeping its size larger than the two cones at the top, move the bottom cone upwards.
- Then, you need to double-click on the face of the cylinder and move it upwards. With that, designing the 3D festive tree is all done. Your child can now decorate it!
You’ve just learnt how to draw a 3D Christmas tree, congrats! Time to dress it up now.
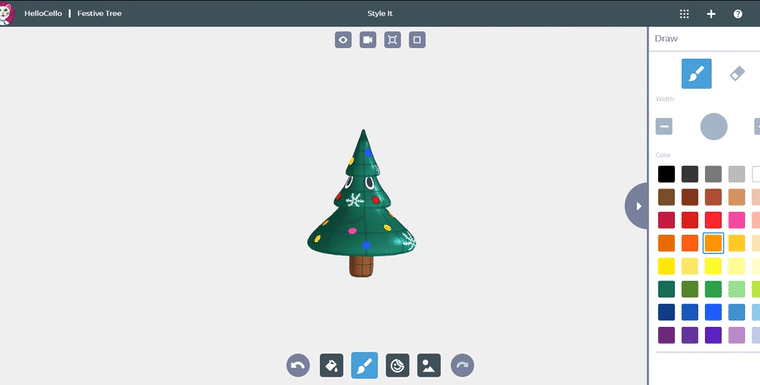
Decorate your Christmas tree 3D model Using Style It
Let’s use another SOLIDWORKS Apps For Kids free app: Style It. Your kids can stylize their 3D Xmas tree to their heart’s content using this cool tool! There are a plethora of backgrounds, stickers, and colors to decorate creations.
The fun-filled app will let the creative juices flow for your kid. Let’s see how!
- Launch the bucket command and click on the green color for the tree.
- Click on the cones of your tree and fill them with green color.
- Select the cylinder and click on brown to decorate the base of the tree.
- Then, launch the sticker window and select the snowflake option.
- Click on the tree cones to add lovely snowflakes!
- You can click on each snowflake to change its color using the palette option.
You can encourage your children to get more creative and turn their tree into a character. Using more stickers, they can add a mouth and eyes for the 3D Christmas tree to come alive!
Let your toddlers have fun with SOLIDWORKS’ entire set of online apps to create their dream 3D Christmas tree. A perfect way to start the Holiday Season!
Back to Blog