Bringing Biology to Life: The Animals in Habitats Project
Educators and parents play a critical role in shaping how students perceive the intersection of technology and the natural world. Modern education requires tools that bridge the gap between abstract scientific concepts and tangible application. The “Animals in Habitats” project does exactly this. It combines biological science with introductory computer-aided design (CAD) to foster critical thinking and creativity.
This guide outlines how to use SOLIDWORKS Apps for Kids to teach students about 3D modeling, animal biology and wildlife conservation. By using the platform at www.swappsforkids.com, students do not just learn about animal adaptations; they apply that knowledge to design creatures capable of surviving in specific environments.
Setting the Stage: Adaptation and Survival
Before students open the software, you must establish a strong scientific foundation. The “Consider This” phase of the lesson plan is crucial. It prompts students to think critically about why animals look the way they do and how their physical traits help them survive.
Start a discussion about different environments such as deserts, rainforests or the arctic tundra. Ask students to identify specific challenges animals face in these regions.
Educator Insight: Sparking Inquiry
To drive engagement, ask targeted questions that require students to analyze cause and effect:
- “Why do arctic animals often have small ears while desert animals have large ears?”
- “How does the color of an animal’s fur help it hunt or hide?”
- “If you moved a penguin to the rainforest, what physical changes would it need to survive?”
This preparatory discussion ensures students approach the design phase with a purpose. They are not just making “monsters”; they are engineering biological solutions for environmental constraints.
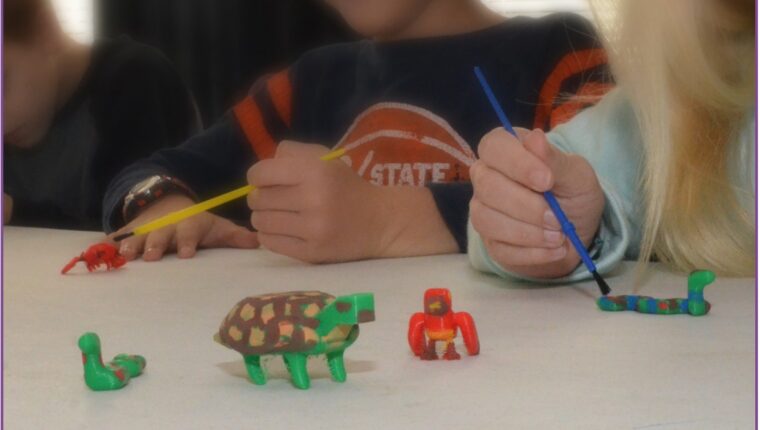
Step 1: Modeling in the Shape It App
Once students understand the concept of adaptation, they move to the Shape It app. This module functions like digital modeling clay, allowing users to push, pull and stretch shapes into organic forms. This approach is far more intuitive for organic modeling than traditional geometric CAD tools.
Starting the Design

Students have two primary ways to begin:
- Start from Scratch: The student begins with a basic blob of digital clay and molds it entirely from their imagination. This offers the most creative freedom but requires patience.
- Riff on an Existing Model: The student selects a pre-made animal from the public gallery and modifies it. This is an excellent option for beginners or shorter class periods.
The Iterative Process
Modeling organic shapes requires trial and error. Students might struggle initially to get the exact shape they envision. Encourage them to view this as an iterative process. Engineering and evolution both rely on testing and refining.
Pro-Tip: Remind students that they can add multiple shapes together. They do not need to pull the entire animal out of one single piece of clay. Adding separate shapes for limbs, heads or tails often yields better results.
Step 2: Visualizing Adaptations in the Style It App

After shaping the creature’s physical form, students transfer their design to the Style It app. This phase focuses on the visual attributes of the animal, specifically camouflage and habitat integration.
Students can apply colors and stickers directly onto their 3D model. This is where the earlier discussion on environment becomes visually apparent. A student designing a predator for a snowy environment should instinctively reach for white or light grey tones. A student designing a rainforest dweller might use vibrant greens or warning colors like bright red to signal toxicity.
Tools for detailing:
- Bucket: Fills large areas with color quickly.
- Paint: Allows for detailed brushwork, such as stripes or spots.
- Stickers: Adds eyes, mouths and texture details.
- Scene: Places the 3D model into a background environment to test how well it fits its habitat.
Educator Insight: Challenge students to use the “Scene” tool to validate their design. Does their animal blend in or stand out? Ask them to justify their color choices based on the environment they selected.
Step 3: Bringing the Design to Reality with Print It
The final phase of the workflow is the Print It app. This module bridges the digital and physical worlds. It allows students to export their work in formats suitable for sharing or manufacturing.
For classrooms equipped with 3D printers, students can download an STL file. This file type is standard for 3D printing slicing software. Holding a physical model of a creature they designed reinforces the reality of their creation and provides a powerful sense of accomplishment.


If 3D printing is not available, students can still produce tangible results. The app allows users to create 2D images or “cube prints” that can be printed on standard paper and folded into 3D shapes. This ensures that every student walks away with a physical representation of their work.
Beyond the App: Career Pathways and Reflection
This project connects directly to real-world science and engineering careers. By engaging in this workflow, students simulate the work of professionals in various fields:
- Zoologists and Biologists: These scientists study animal behavior and physiology to understand how species survive.
- Fish and Game Wardens: These professionals manage wildlife populations and habitats, requiring a deep understanding of the ecosystem.
- Bio-engineers: These engineers look to nature for design solutions, a field known as biomimicry.
Aligning with Standards
The “Animals in Habitats” project supports Next Generation Science Standards (NGSS). Specifically, it addresses the engineering design process where students define a problem (survival in a habitat), develop a model (the 3D animal) and refine their solution. It moves science education from memorization to application.
Reflection Questions
Conclude the project by having students reflect on their design choices:
- How does your animal stay warm or cool?
- What does your animal eat, and how does its body help it get food?
- How does your animal protect itself from predators?
Conclusion
The “Animals in Habitats” project offers a robust framework for teaching essential STEM concepts. It integrates biology, technology and design thinking into a cohesive lesson that engages students of various skill levels. By guiding students through the process of considering adaptation, modeling a solution and refining their design, you equip them with the skills to think like innovators.
Access the Full Lesson and More
This article offers just a glimpse of what the Designing Wearable lesson provides. The complete lesson plan – along with many other classroom-ready activities – is available through the SOLIDWORKS Apps for Kids Classroom platform.
👉 Create a free Classroom account to access the full lesson, educator resources, and a growing library of activities designed to inspire young learners to create, invent, and shape their futures.
Because when students design something of their own, learning becomes personal and unforgettable.
To get started with your class, visit https://www.swappsforkids.com/educators/ and register for a free account.
Back to Blog