Teaching Aerospace Design: The Flying High Project
Educators and parents hold the responsibility of preparing students for a future driven by technology and scientific innovation. You can inspire students to create, invent and shape their futures by introducing them to practical design concepts early in their education. The “Flying High” project offers a structured, engaging way to introduce K-12 students to aerospace engineering and 3D modeling.
Using SOLIDWORKS Apps for Kids, students explore the science of flight while developing critical thinking skills. They design aircraft, test their ideas and connect digital modeling to physical reality. This guide explains how to facilitate this project and turn a simple lesson into a robust exploration of engineering.
Sparking Curiosity: The Preparatory Discussion
Before students open any software, you must establish a strong scientific foundation. The “Consider This” phase of the lesson prompts students to think about aerospace engineering and its impact on human life. Aerospace involves designing and building air and spacecraft.
Start a discussion about the challenges engineers face when building new aircraft. Ask students to consider how air travel changes the way people work, communicate and live.
Educator Insight: Driving the Conversation
To make the discussion actionable, ask students to consider specific scenarios:
- How do airplanes change the way we buy goods or visit family?
- What challenges do engineers face when sending spacecraft into orbit?
- Why does exploring space matter for our future on Earth?
This preparation ensures students approach the software with a clear mission. They act as engineers tasked with designing a new aircraft to transport people or cargo.
The Step-By-Step Design Workflow
The project uses three distinct applications on www.swappsforkids.com to guide students from concept to physical model.
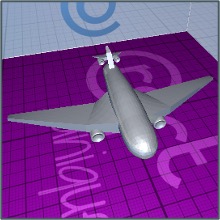
Phase One: Modeling With the Shape It App

Students begin their engineering process in the Shape It app. This digital tool functions like modeling clay, allowing users to push, pull and stretch shapes into complex forms.
Students have two ways to start their designs:
1. Start from scratch: Students launch a blank workspace and build their aircraft using basic shapes like boxes, cones and cylinders.
2. Riff on an existing model: Students select pre-made aircraft components from the public gallery and modify them. This option helps beginners understand the software quickly.
Designing new machines requires trial and error. Students must understand that engineering relies on continuous testing and refinement. Encourage patience if their initial designs do not match their vision.
Pro-Tip: Remind students that they can build complex aircraft by snapping multiple simple shapes together. They do not need to pull an entire airplane out of a single block of digital clay.
Phase Two: Visualizing Function With the Style It App
Once students complete the physical structure of their aircraft, they move to the Style It app. This phase focuses on the visual attributes of the machine. The look and design of an aircraft often communicate its purpose.
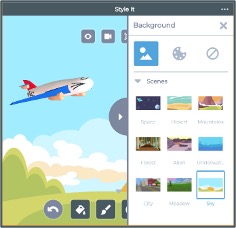

Students apply colors, textures and details to their models to make them realistic. The app provides several tools for this process:
- Bucket: Fills entire shapes or individual patches with a solid color quickly.
- Paint: Allows students to apply specific colors directly onto shapes using different brush sizes.
- Stickers: Adds detailed elements like windows, doors and warning labels.
- Scene: Places the aircraft into a background environment to show where it operates.
Educator Insight: Ask students to explain how their color and sticker choices reflect the aircraft’s function. A cargo plane might need high-visibility colors, while a space exploration vehicle might require heat-resistant visual shielding.
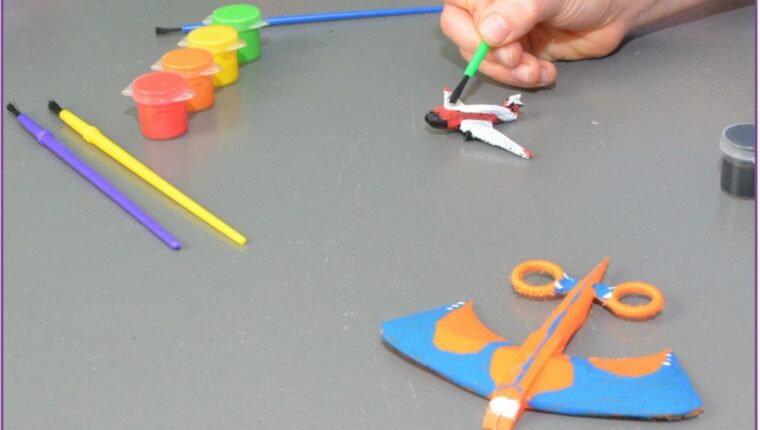
Phase Three: Bringing Designs to Life With the Print It App

The final technical step involves the Print It app. This tool bridges the digital design and the physical world.
For classrooms with access to 3D printers, students can export their designs as STL files. Students download these files and import them into standard 3D printing software. Holding a physical model of an aircraft they designed provides a profound sense of achievement.
If you do not have a 3D printer, students can still create physical representations. The app allows users to export 2D images or specialized cube prints that students can print on standard paper, fold and tape into 3D shapes.
Beyond the App: Real-World Science and Careers
This project connects classroom activities to real-world STEM careers. By completing the workflow, students simulate the daily tasks of professionals in the transportation and design industries.
You can introduce several career paths during this phase:
- Aerospace Engineers: These professionals design, test and supervise the manufacturing of aircraft and spacecraft. They constantly experiment to improve flight efficiency.
- Industrial Designers: These specialists focus on the user experience. They design airline cabins, evaluate passenger comfort and test new seating arrangements.
- Logistics Engineers: These experts create boarding procedures, manage flight schedules and ensure airports operate smoothly.
Reflection and Evaluation
Conclude the activity by asking students to evaluate their designs critically. Have them answer the following questions:
- Why did you choose this specific type of aircraft?
- How does the design of your aircraft improve the way it works?
- In what ways does your design improve upon existing airplanes?
Conclusion
The “Flying High” project delivers a comprehensive introduction to design thinking and engineering principles. The activity aligns directly with Next Generation Science Standards (NGSS) by requiring students to define problems, develop models, test their solutions and refine their designs.
By guiding students through the process of conceptualizing, modeling and reviewing an aircraft, you give them the tools to think like future innovators.
To start this project with your students, visit www.swappsforkids.com to set up your free account.
Back to Blog